How to create and manage advertising campaigns in Finteza
Marketing Resources
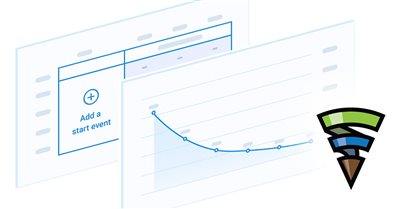
Finteza is a cutting-edge powerful tool which can help you reach your target audience. Log in to the system and launch full-scale campaigns on desired available resources, including websites, mobile applications and software programs.

What is a campaign, a banner group and a banner?
Advertising in Finteza concerns dealing with three entities: campaigns, banner groups and banners. A campaign is the primary entity. It includes one or more ad groups. At the campaign level, you set the targeting options and select advertising zones to display your ads. Furthermore, you can configure advertising schedule, set the beginning and ending dates, the time of the day and days of the week. These settings apply to all ads within a campaign.
A group of banners contains one or more creatives having the same landing page URL, which is specified at this level. A campaign can include one or more groups. For example, one campaign may include three groups with different URLs, each containing 15 banners.
At the banner level, you can set language targeting and add creatives. A banner in Finteza is a graphic and text block of any required size and format. The system supports popular bitmap image formats, such as gif, jpg and png, as well as HTML5 banners. This opens up a wide range of possibilities for using multimedia and interactive content, including raster graphics, animation, text, video and sound effects. The HTML5 format allows the creation of landing pages, sliders, native advertising blocks and other materials for your campaigns.

Finteza allows you to create adaptive banners: simply upload an image, add texts and select CTA button. The system will automatically create blocks of the appropriate size for all the zones specified in the campaign settings. All your adaptive banners are saved and can be used for other campaigns as well.
Creating an advertising сampaign
As an example, let's create a simple campaign aimed at encouraging smartphone and tablet users from the UK to read news published in our site. Select Campaigns in the main menu and press the "Create campaign" button in the upper right corner. In the campaign settings, you shall specify the campaign name.
Please mind the "Campaign owner" field. A legal entity in Finteza is the identifier, to which users, advertising campaigns and banners are linked. If you have access to multiple legal entities, select the one which will represent the campaign owner. Only users linked to this legal entity will have access to appropriate campaigns and advertising materials.
Step 1. Campaign setup
- Advertising schedule, including the beginning and ending dates, as well as the time of the day and days of the week are set in the Period block. If you leave these fields empty, the campaign will start immediately after launch and will run until manual termination.
- Find United Kingdom in the Locations field and click Include (you can also include and exclude multiple countries and territorial units). If you want to display your ad campaign to users from around the world, check "All countries and territories".
- We are interested in mobile iOS and Android devices users, so let's select operating systems for each device in the User Agents block and click Next at the bottom of the page:

- Specify advertising zones, in which the banners will be displayed. You may use any of the zones which have been created in Finteza and added to a website.
The choice of a zone depends on whether you plan to use bitmap or adaptive banners. Note that the zone size should correspond to the banner size. If you use bitmap or raster (non-adaptive) creatives, their size must be equal to the zone size or be a multiple of it. Otherwise, the banner may distort the placement. Adaptive blocks are automatically adjusted to the zone size. Make sure that the appropriate adaptive banner format is available for the selected zone. In our example, we choose two zones for the mobile and tablet site versions and click "Next" at the bottom of the page:

Step 2. Creating a banner group
Click Create Group. Specify the name of the banner group and the link. We recommend using UTM tags in links, which enable the evaluation of campaign effectiveness.
Below you will see the list of websites and areas selected in the previous stage. If you are going to use adaptive banners, check all placements, so that banners are automatically added to each of them. Non-adaptive banners should be added to each zone separately, therefore, check only one placement in this group.

Step 3. Adding banners
You can upload new banners to the group, as well as create adaptive ones or reuse previously added banners.
3.1 Uploading banners
Click Create Banner. First, select the advertisement language from the list. Finteza features automatic banner language targeting. This is a convenient option when you create one campaign and add advertising materials in different languages. The system will automatically display the banner in the language set in the user's browser. You can select "All" to display the ad to all users regardless of the browser language. Alternatively, you can select a certain language to narrow the target audience.
Next, specify the name of the banner. We recommend using the built-in generator, in which case the name will consist of [language prefix] [campaign name] [series name] [number of the banner in the series]. This provides an ordered arrangement of banners and simplifies banner search. The current campaign name is specified in the "Campaign name" field. Please do not change it. In the "Series name" field, enter a word or phrase characterizing advertisement contents. In our example, we advertise new developments and updates, so we will name it "Latest developments". The last action is to set the serial number. The numbering starts at 001 by default, and further progression for newly uploaded banners will be set automatically: 002, 003 etc.
The name of the finalized banner appears in the "Final name" field. If you do not use the built-in generator, enter the desired name here.
Enable Non-Adaptive in the wizard switch below the name generator.
We recommend uploading creatives 4 times the size of the zone size (twice as high and twice as wide). Finteza will compresses the banner to the desired size, while the pixel density will be increased. This will make your ads to be displayed clearly on HiDPI screens and on mobile devices.
Here is an example of a banner sized 1600*160 added to a zone of 800*80 pixels:

Here is the banner sized 800*80 (the difference is seen on HiDPI screens):

Drag one or more banners from your computer in the Drag'n'Drop window (banner size should match the zone size) or select them by clicking on "Select file". After uploading the desired banners, click "Upload and save":

The banner has been added to the group:

3.2 Creating adaptive banners
In the banner group, click Create Banner and set the name as described in step 3.1. Enable Adaptive in the switch.
Finteza supports images up to 1 MB with an aspect ratio of 1:1.91 (standard Facebook block ratio) up to 1200 pixels. We recommend uploading images of the maximum supported size: 1200*628. You do not need to upload resized banner formats, as Finteza generates them automatically.
Enter the banner name and its description. Finally, select CTA (button text). Please note that button names are given in the Finteza interface language for ease of use. In the finished block, the button will be automatically translated into the banner language (7 major languages are currently supported. More languages will be added later). The result of each step is displayed in the preview window at the bottom. Using the "Next banner" and "Previous banner" arrows, you can view the generated banners of all sizes set by the system:

Click "Upload and save". Finteza automatically generates banners of the desired width/height. Furthermore, banner components can be simplified or omitted depending on the final block size. For example, only an image, a header and a simplified button are used on a mobile banner sized 414*80. There is not enough space for the text description and the CTA button:

3.3 Add banners from the library
Banners in Finteza are separate units and can therefore be reused in campaigns. Click "Add banners from existing", and you will see the newly added creatives in the library. If the library contains a large number of banners, you may use filters and/or keywords for faster search. Check creatives you want to add to the placement.

Clicking Add will add selected blocks to the group. One group may contain both adaptive and non-adaptive banners. Any number of groups can be included into a campaign.
Once you have added the desired banners and links, click "Confirm & Run" to launch the campaign. If you want to launch it manually later, click Save. The campaign will be paused in this case.
Managing advertising campaigns
To stop, edit or delete a campaign, and view the history of changes, select the appropriate commands from the menu:

In the Edit mode, you can add or delete ad zones and ad groups, as well as add/delete or start/stop creatives. After editing a campaign, click Save for the changes to take effect.
Finteza will start collecting statistics on views, clicks and CTR, right after you launch a campaign:

Click on a campaign name to view the detailed report:

This report provides comprehensive information on users to whom the advertisement was displayed. The interface is quite simple and easy to understand, but we will write a separate article about it just in case.
Meanwhile, log in to Finteza to launch and analyze advertising campaigns.